Getting Started with Elements in LTX
Elements is your central hub for managing visual components in LTX, including everything from Characters and Objects to Logos, Fonts, Styles and Other assets. By keeping your visuals in one place, you can easily reuse, update, and refine Elements across scenes, ensuring consistency across generated assets and projects.
This cross-project-supporting UX gives creators and teams full control to build coherent components across different worlds and workflows. Whether you're designing your protagonist, launching a product, defining a brand identity with custom logos and fonts, or developing a multi-scene narrative, Elements streamlines asset management—saving time, strengthening creative direction, and ensuring visual continuity at scale.
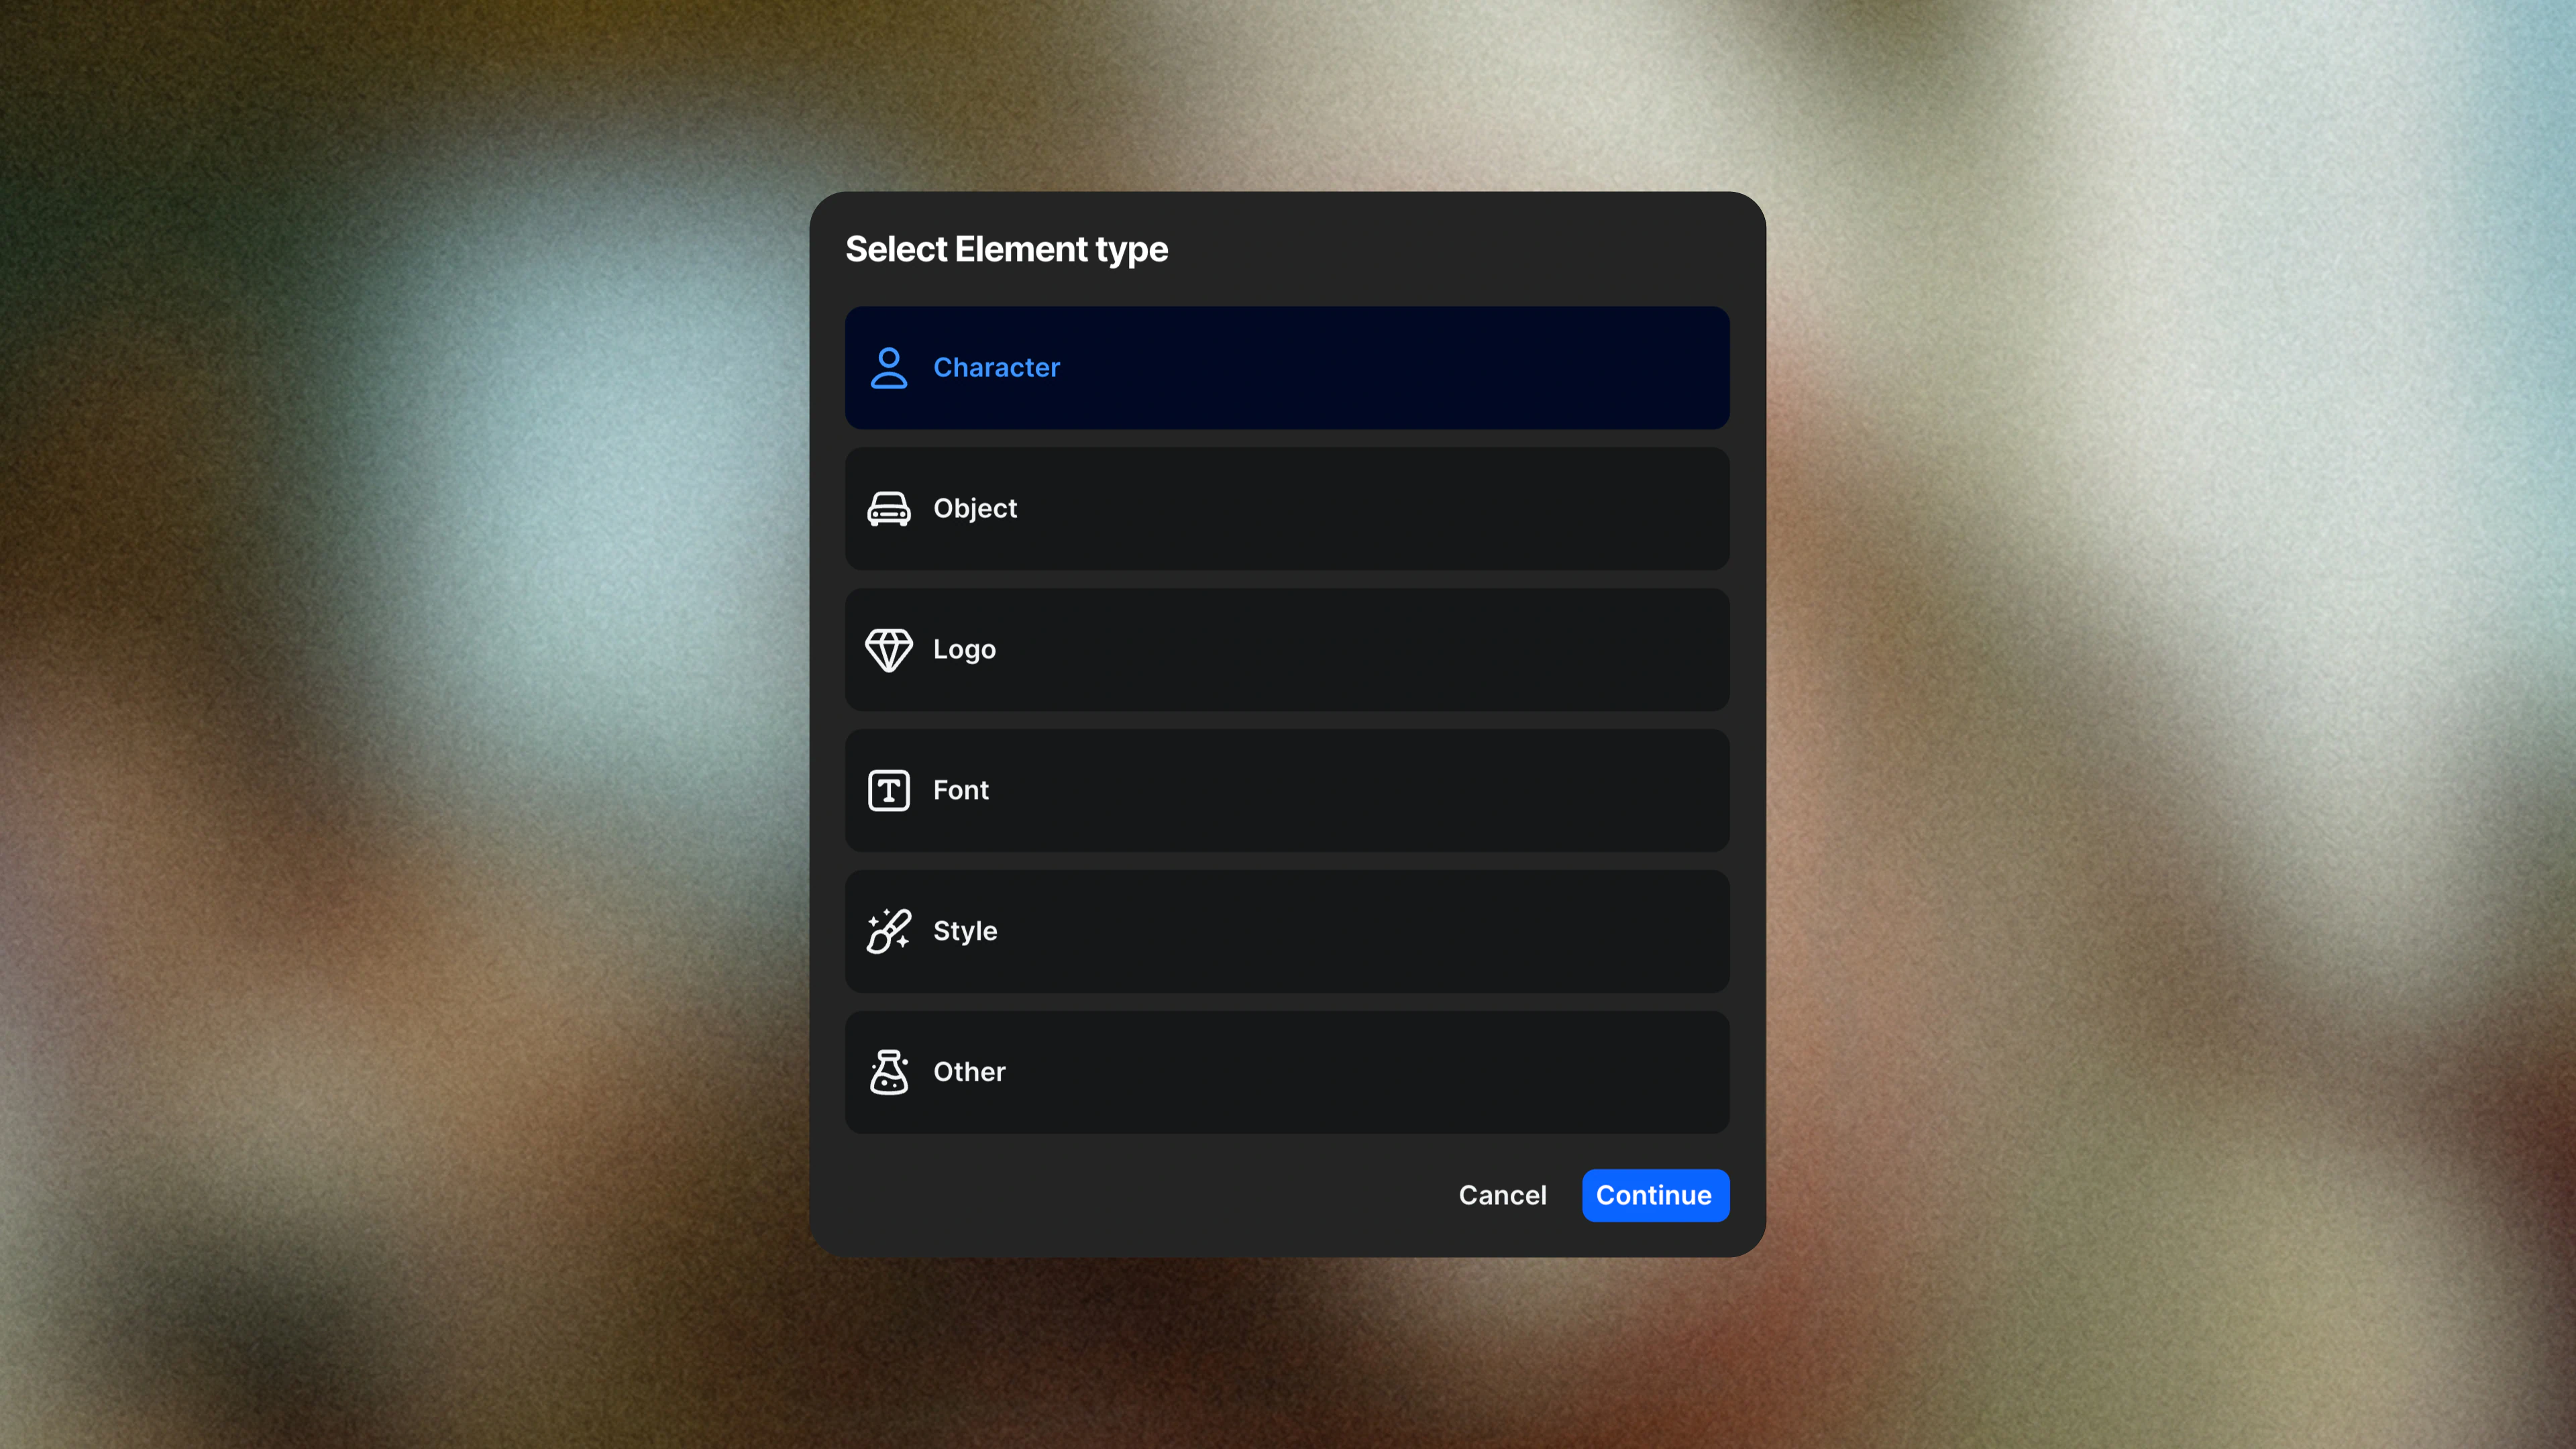
Before diving into how to create Elements in LTX, let's define the types of Elements you can create: Characters, Objects, Logos, Fonts, Styles and Other.
Six Types of Elements
There are six types of Elements in LTX, each designed to keep your visuals consistent and make assets easier to manage.
Character
Use Character for people that appear throughout your story or campaign. You can assign them a voice and reference them with tags throughout your project.
Object
Use Object for items without voices - like props, wardrobe pieces, or products. Ideal for brands or creators managing consistent product shots and repeating visual assets.
Logo
Use Logo to maintain brand marks and visual identities across scenes and projects. Logo Elements are ideal for campaigns, branded content, and product launches where brand accuracy and consistency are essential.
Font
Use Font to define and reuse typography across your project. Font Elements help maintain consistent typographic style for titles, overlays, and branded text, ensuring coherence across all generated assets.
Custom Style
With Custom Style, you can define a reusable aesthetic using up to 10 visual references, without having to describe your visual language in words. Save styles as Elements and reuse them across generations to maintain consistent, original, on-brand assets from start to finish.
Other
Use Other for anything that doesn't fit the categories above, such as specific textures, lighting effects, or unique visual styles.
Two Ways to Create Elements
Building Elements is ideal for when you're starting a new project and want to set a clear look and feel for the visuals. You can create Elements in two different ways in LTX, each designed to accommodate different stages of the creative process.
Option 1: Create within the Elements Workspace
- Open Elements inside LTX.
- Under "Create New Element," choose the type you'd like to make: Character, Object, Logo, Font, Styles or Other.
- Generate or upload an image to define your Element's appearance.
- Name the asset clearly (for example, "@Protagonist" or "@CompanyLogo").
Your new Element will appear in your project's Elements panel, ready to reuse in any shot or scene.
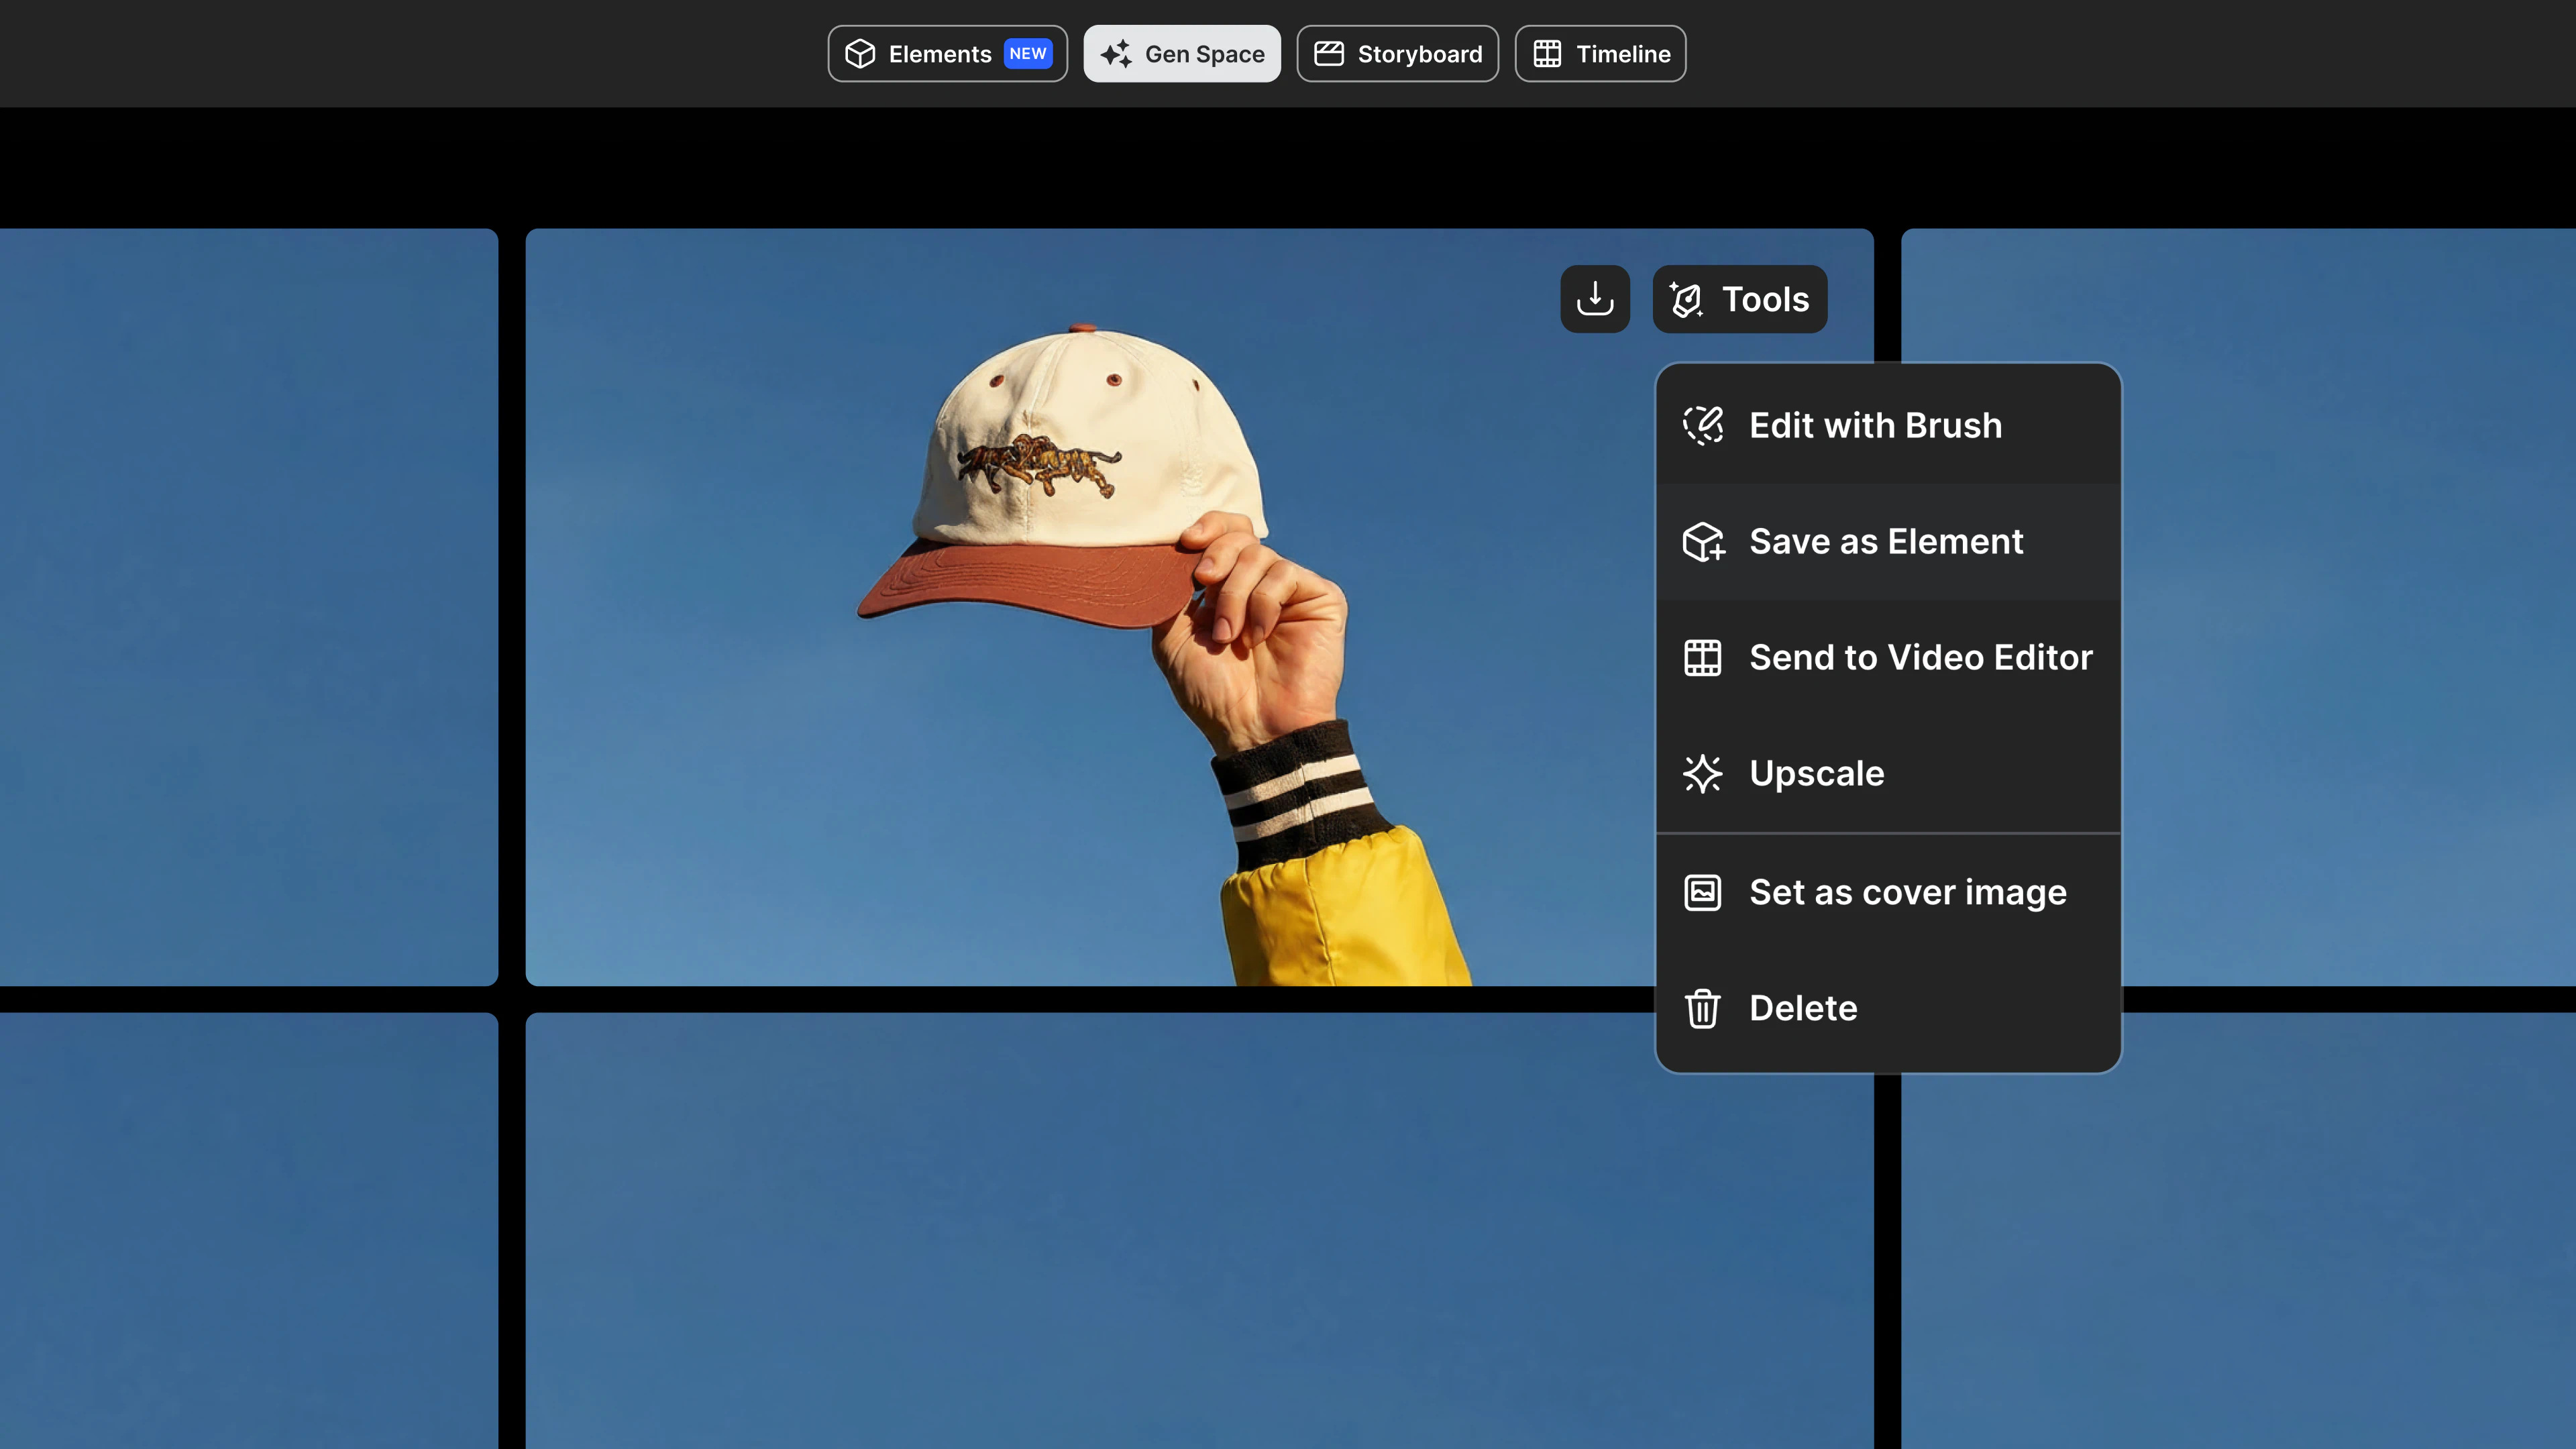
Option 2: Save your Element from Gen Space
- Open the Gen Space.
- In the top-right corner of your chosen asset, click the Tools menu and select "Save as Element."
- Name your Element and choose the correct type (Character, Object, Logo, Font, Styles or Other).
- Click "Save Element."
Once saved, your new Element can be used in any of your project's shots. Each Element you create is automatically saved to your project's Elements hub, where you can edit, reuse, or tag it later.
Pick a Voice for Characters
If you select "Character" as the Element type, you'll be able to assign a voice and customize it as needed. Adding a voice brings your story to life, helping you hone the necessary specificity to create believable material and consistent character performances.
How to Assign a Voice
- From the Elements workspace, select a Character Element.
- Click "Assign Voice."
- Choose from the available voice options in the library.
- Click "Save" to apply your changes.
Your character's voice is now linked to that Character and will carry through every tagged appearance in your project, ensuring consistency across scenes and shots.
Use an Element in Your Project
Once you've created an Element, you can use it anywhere in your project to keep your visuals aligned. Tagging an Element connects it to your shots, ensuring the same Character, Object, Logo, or Font appears consistently across scenes. Tagging your Elements can be done from either the Gen Space or the Storyboard workspace.
How to Tag an Element
- Open a shot in the Gen Space or a Storyboard.
- Click inside the prompt or shot description field.
- Type @ followed by your Element's name (for example, @Protagonist, @ProductShot, @BrandLogo, or @PrimaryFont).
- LTX will automatically link that Element to your shot, applying its visual properties wherever it's used.
Prompting Tips for Fonts and Logos
When working with Font or Logo Elements, referencing them explicitly in your prompt helps guide the model more effectively. For example, use phrasing like "the text is in the style of @PrimaryFont" or "place @BrandLogo on the packaging" to ensure reliable results.
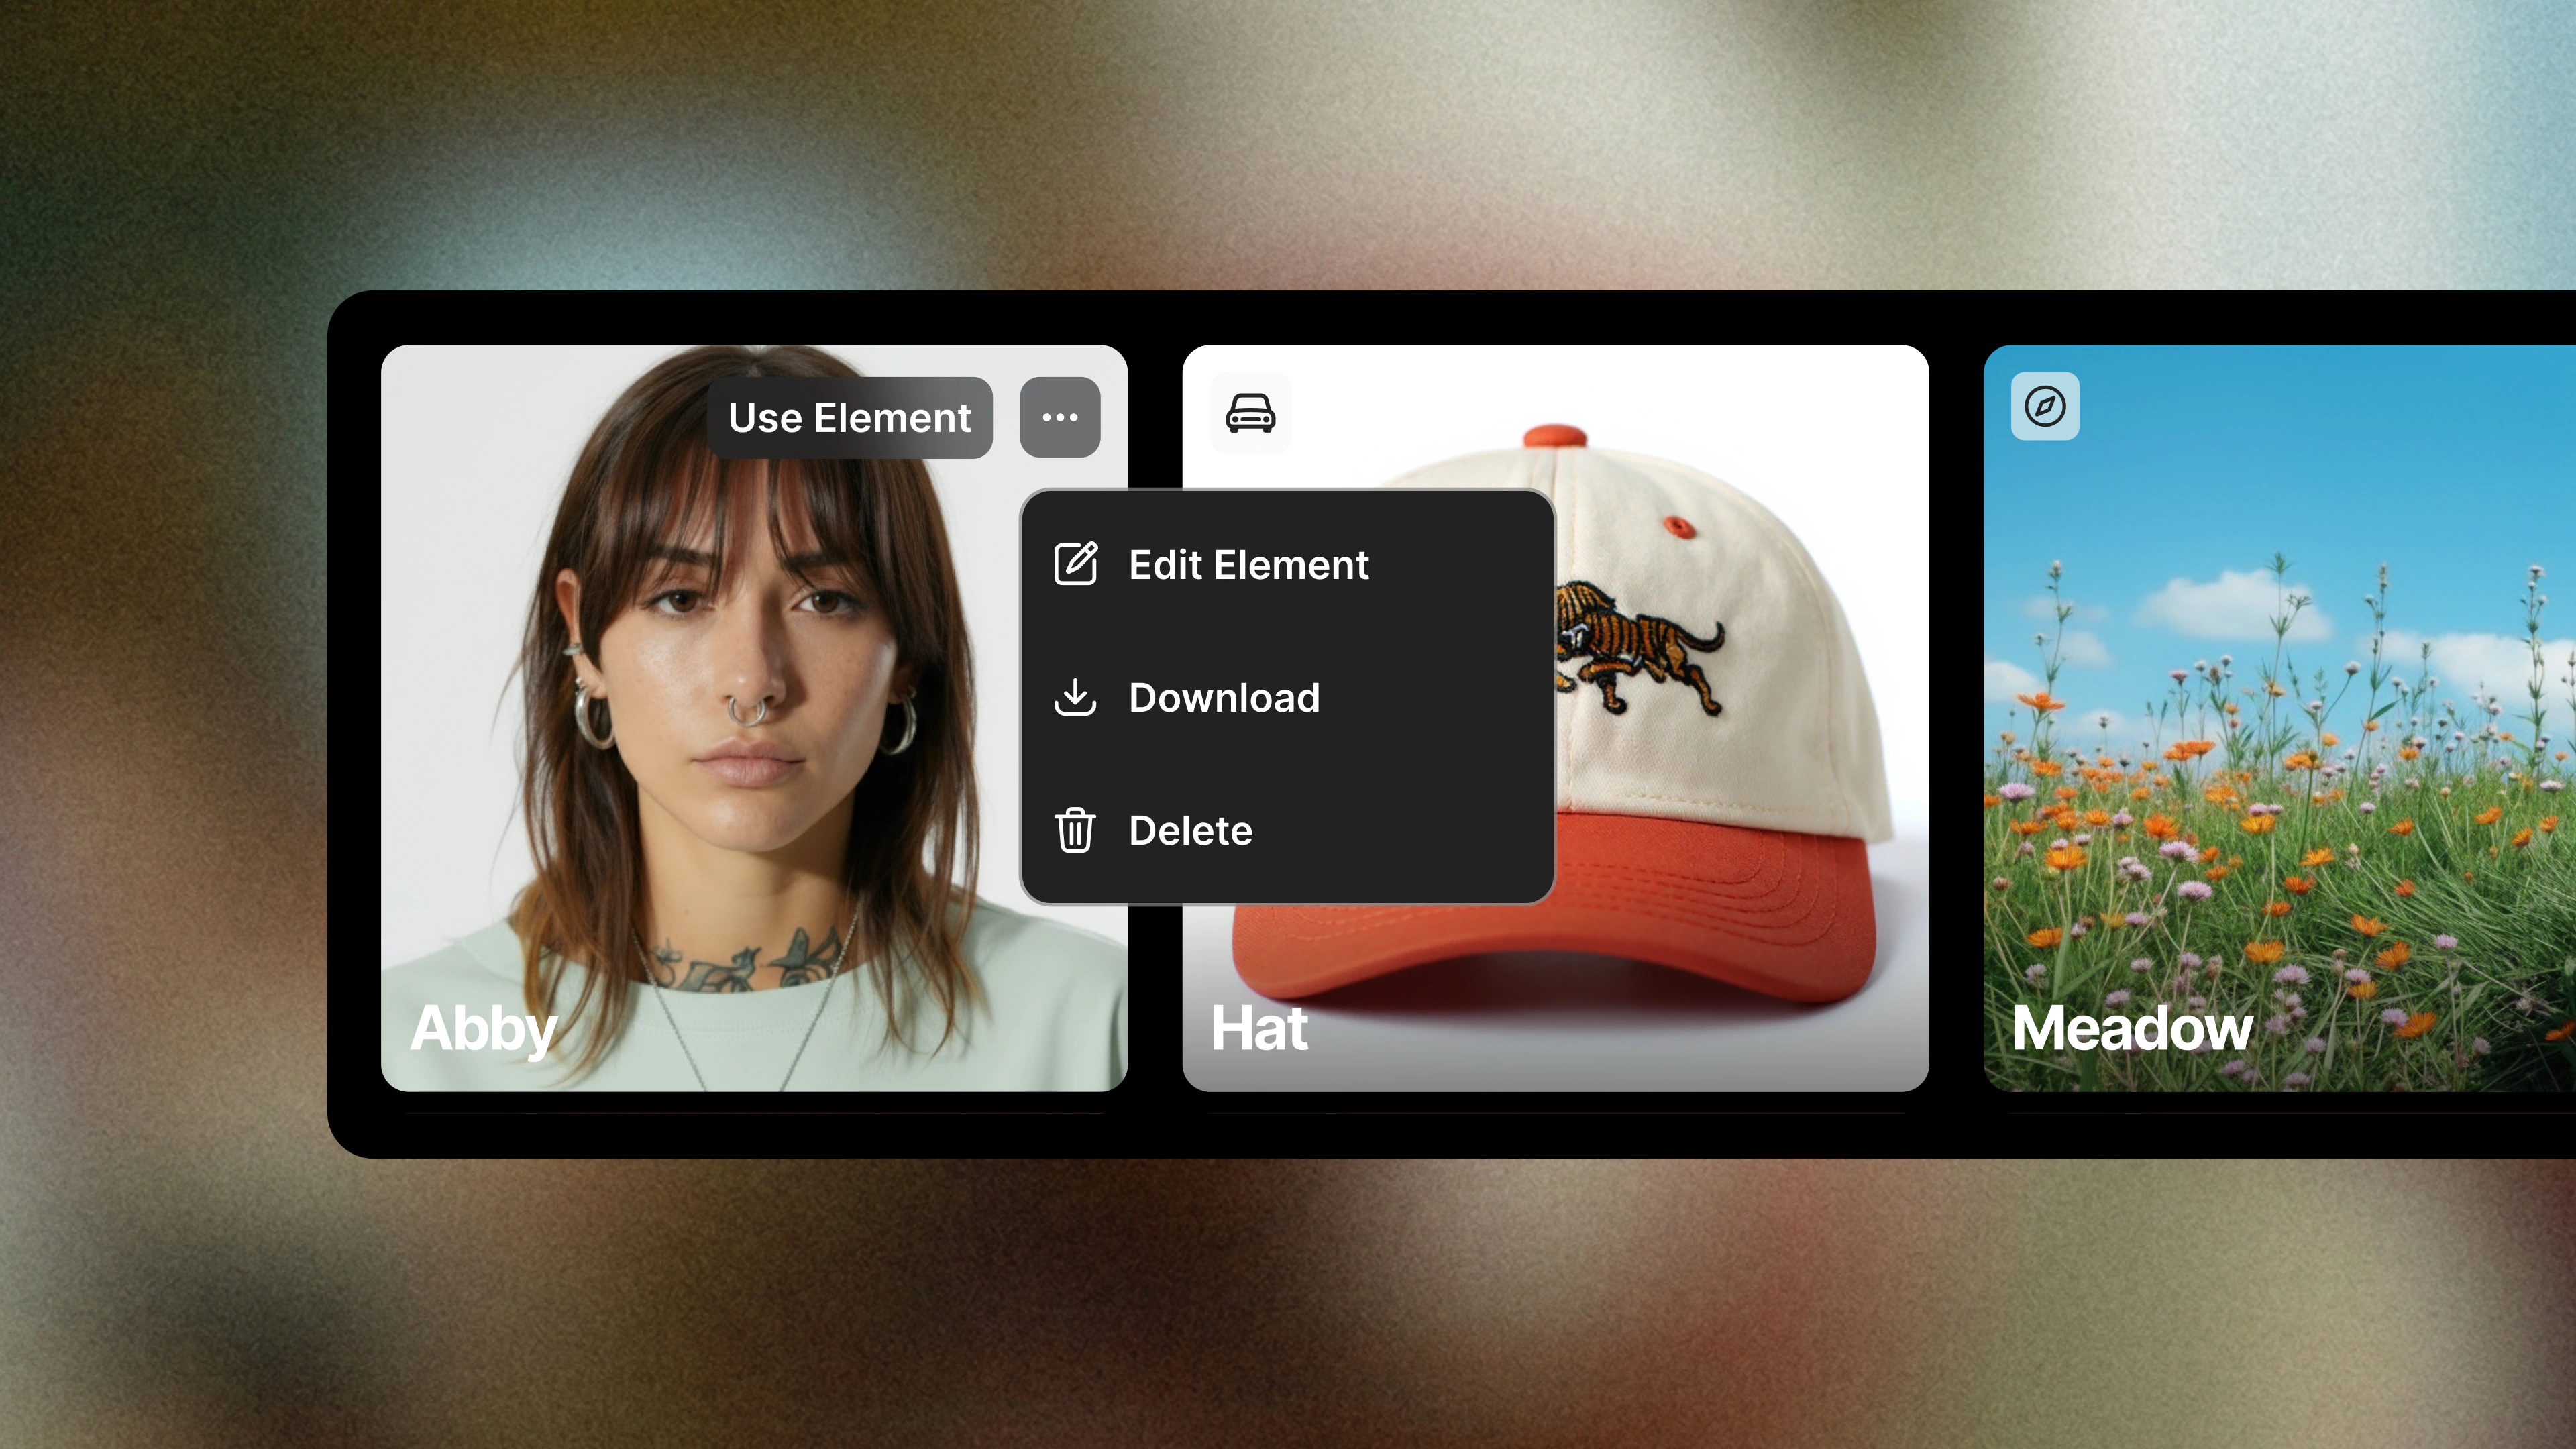
View and Edit Elements
Now, you can view and manage all your Elements in one place. From the Elements workspace, you can open any asset to review or update its details, ensuring your project stays visually consistent as it evolves.
How to Edit an Element
- Go to the Elements workspace and select the Element you want to update.
- Click "Replace Image" to update the visual.
Your changes will automatically apply anywhere that Element is tagged, keeping your project up-to-date without breaking continuity.
Team Alignment with Elements
Elements make collaboration seamless. When a team lead shares a project, every member has access to the same Elements, ensuring that everyone works from the same visual source. This shared foundation helps teams stay aligned, reduce visual drift, and maintain brand and narrative consistency throughout the creative process.
How It Works
- The project owner creates and saves key Elements to be used across a project.
- When shared, team members can tag and reuse those same Elements in their shots and scenes.
- Any updates to visuals or details instantly sync across shared projects, ensuring consistency and reducing manual rework.
This workflow enhances creative direction while supporting asset management—whether you're building a campaign, launching a product, maintaining brand consistency across markets, or producing a short film.
Best Practices for Elements
To achieve the most consistent results, follow these best practices when creating new Elements:
Background & Position
Use a clean, neutral background (preferably white or gray) to help Elements integrate easily into different environments. Center your subject and leave space around the edges for flexibility when framing.
Frontal Images
Frontal views are preferred, especially when you're creating Character or Object Elements. Frontal angles are the easiest to reuse across scenes and will ensure your Element remains recognizable from shot to shot. If needed, use the Gen Space to adjust the angle of your reference image.
Lighting
Stick to soft, evenly distributed lighting. Avoid dramatic or directional shadows that may clash with other shots. If needed, adjust lighting in the Gen Space by uploading the image as a reference and using the following prompt: "Turn lighting to soft white studio light."
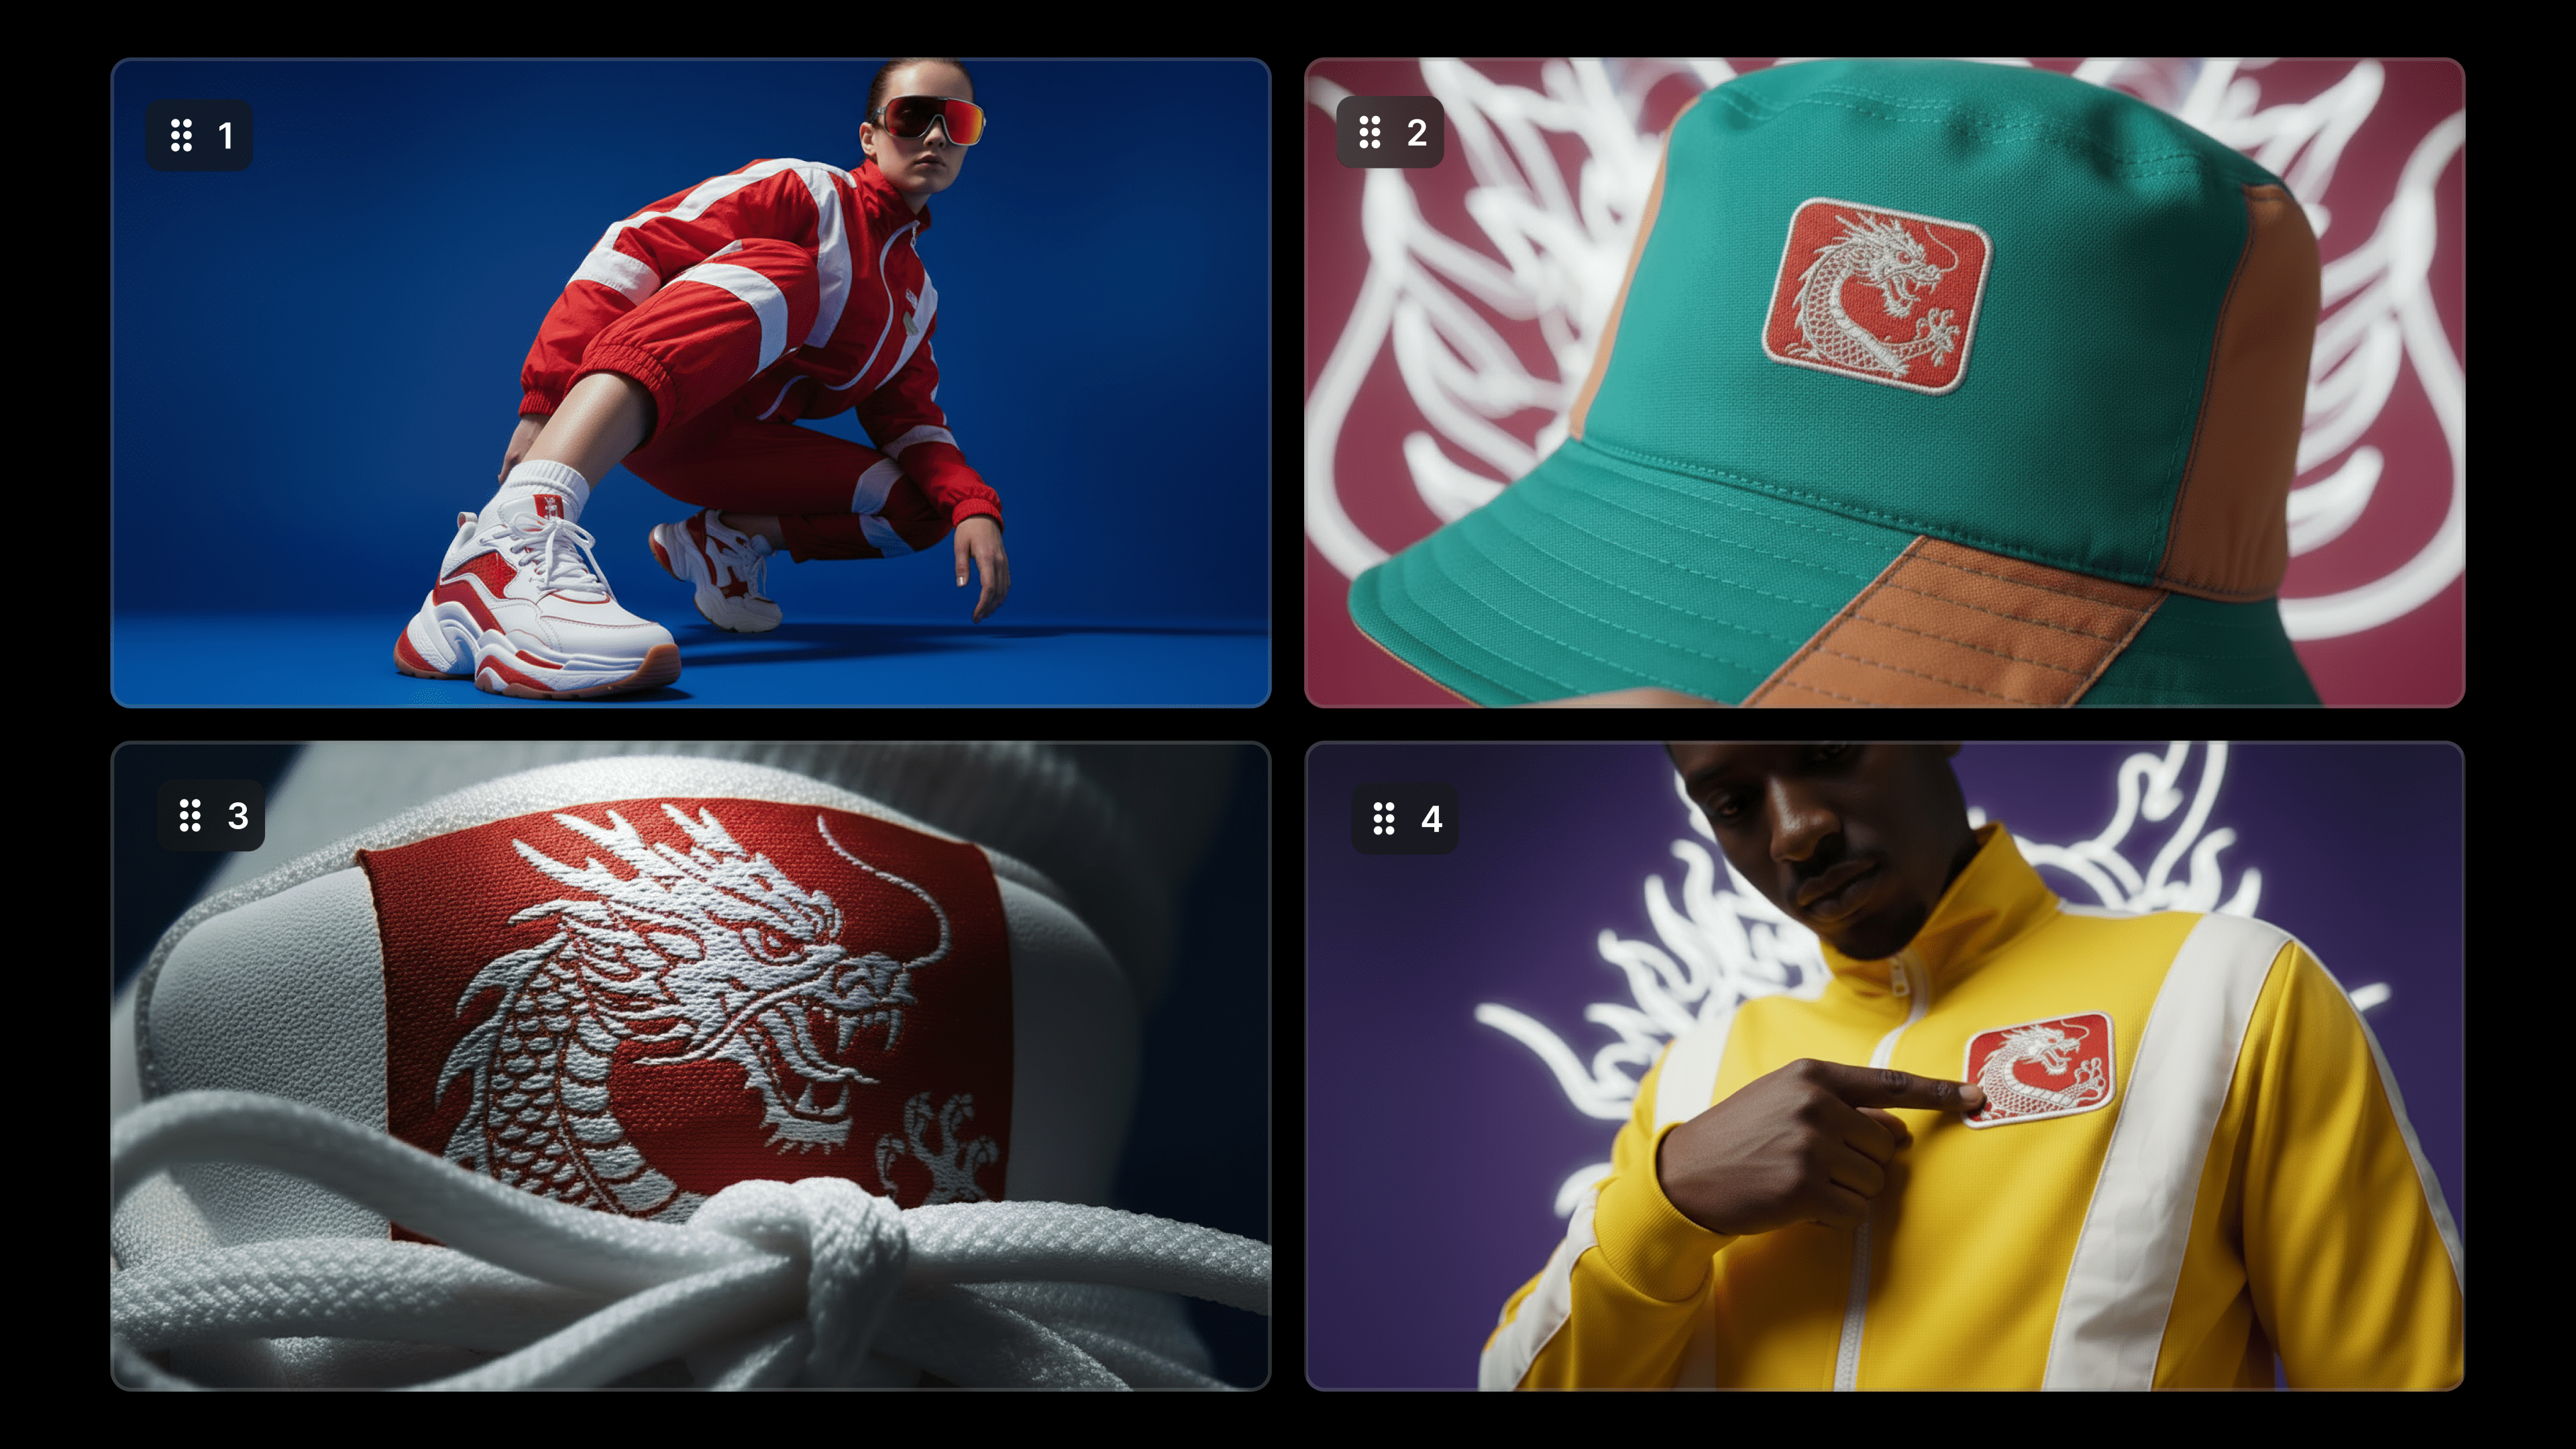
Product/Object with Branding
When creating branded products or props, keep the brand name, logo, or label visible. Use high-resolution images and ensure that all branding—especially logos or typography—is clear and readable. When prompting, use grammar emphasis by placing the most important aspects at the beginning of your prompt sentence.
“Character” Elements
Create neutral, front-facing portraits with balanced lighting and simple clothing. Avoid extreme expressions or poses—this makes characters easier to adapt across moods, outfits, and environments.
“Logo” Elements
White backgrounds are strongly recommended for Logo Elements. Black or transparent backgrounds may cause unwanted background artifacts in generated results. For best results, use image-only logos (without text) as Elements. If your logo includes text (a logotype), consider using it as a reference image instead for more reliable text rendering.
“Font” Elements
Upload clear, legible images that accurately represent the typeface, font files are not currently supported. Avoid decorative effects or extreme styling that could interfere with recognition. For best results, include the font name in your prompt when applicable (for example, "Helvetica-style text").
“Custom Style” Elements
Choose visual references that clearly reflect the style you want—such as moodboards, marketing assets, or other relevant visuals. Avoid duplicate or overly similar images, which can cause certain details to be overemphasized. For consistent results, tag your Custom Style at the end of the prompt to apply it across the entire generation.
"Other" Elements
Use Other for Elements that don't fit a main category—such as textures, lighting styles, or unique visual treatments. Add a clear description of what the Element represents and how it should be used to ensure it's applied consistently across the project.
Use Cases for Elements: Build Your Brand
Elements make it easier to manage your branded assets, including products, characters, logos, and fonts. When you use Elements in your projects, you can scale your content creation while maintaining a consistent and recognizable brand identity.
Upload your product and create multiple variations with different characters, logos, or fonts while maintaining a consistent look and feel. Adapt your campaign for every market while keeping production fast and your visuals unmistakably on-brand across all assets.
Get Started with Elements Today
Now available for all text-to-image models on LTX, Elements will immediately make your workflow smoother, at no additional cost.
Elements gives brands creative control, one place to manage products, characters, logos, fonts, styles and visual assets, so every campaign looks unmistakably yours.
From global launches to product refreshes, Elements keeps every asset aligned—your models, products, logos, and typography stay consistent across markets, formats, and teams. Generate, update, and localize visuals instantly, without losing your brand's look and feel.
Consistency that scales. Try it in LTX now.
Elements FAQs
What are Elements in LTX Studio?
Elements is a centralized hub for managing visual components including Characters, Objects, Logos, Fonts, Styles and Other creative assets across projects in LTX. By storing visuals in one place, you can reuse, update, and maintain consistency across generated assets, ensuring coherent visuals throughout different scenes and workflows.
How do you create and save Elements in LTX Studio?
You can create Elements in two ways: directly in the Elements workspace by choosing a type (Character, Object, Logo, Font, Styles or Other) and generating or uploading an image, or by saving from Gen Space using the Tools menu and selecting "Save as Element." Character Elements can be assigned voices for narration consistency.
What are best practices for creating consistent Elements?
Use clean, neutral backgrounds (white or gray) with centered subjects, frontal views for Character and Object Elements, soft, evenly distributed lighting without dramatic shadows, and high-resolution images with visible branding for products. For Logo Elements specifically, white backgrounds are strongly recommended—black or transparent backgrounds may cause unwanted artifacts in generated results. When creating Custom Style Elements, avoid using duplicate or highly similar visual references, as this may cause the model to overemphasize certain elements. For best results and consistent control, tag the Custom Style at the end of your prompt to ensure it’s applied throughout the generation.


Maximize your creative potential with AI-powered tools
Maximize your creative potential with AI-powered tools


.png)